20+ years as a wedding photographer + now designing Showit websites built to help creatives get found, connect, and book the right clients with ease.
Quick Answer:
Most photographers think the hard part is choosing the template.
In reality, the hard part is hitting publish.
The fastest way to launch a Showit website isn’t to start changing fonts or swapping images. It’s to get clear on what you want your website to do, gather your content, customize intentionally, and launch before it feels perfect.
If you’ve recently purchased a Showit template, or are thinking about it, and are feeling a little overwhelmed, you’re not alone. Let’s make sure you’re starting in the right place.
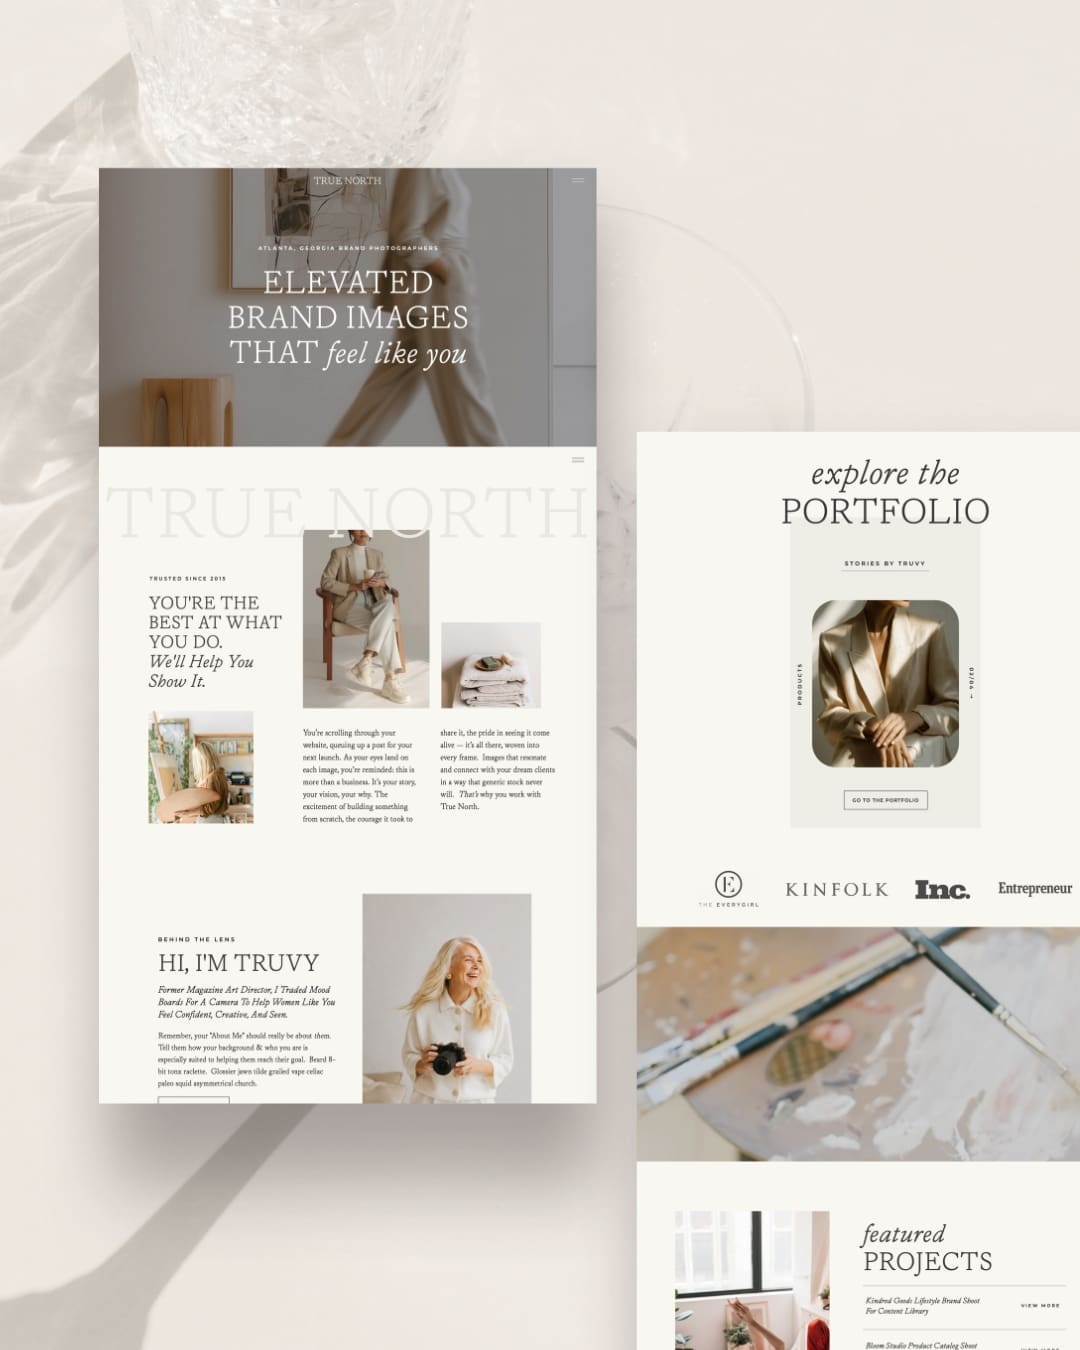
The Pinkerton House Perspective
If you’ve ever purchased a template, opened Showit, clicked through a few canvases, immediately felt overwhelmed, and quietly closed your laptop again…you’re not alone.
I’ve seen it happen more times than I can count.
And the template probably isn’t the problem.
The problem is our eagerness to start customizing everything immediately.
So we start changing fonts.
Or tweaking colors.
Or spending forty-five minutes deciding between two nearly identical images.
Meanwhile, the homepage still begins with Lorem Ipsum 🙋♀️.
The truth is that launching a website is much easier when you start with a clear plan.
Not all at once.
Not perfectly.
Just one step at a time.
And because I love me a good checklist, here’s one you can walk through to help you customize your Showit site and get it launched fast, and without the overwhelm.
Step 1: Don’t Open Showit Yet
I know – not what you expected, but hear me out.
Before you start moving things around, take a few minutes to think about what you actually want your website to accomplish.
Ask yourself:
- Who am I trying to attract?
- What type of work do I want more of?
- What experience do I want potential clients to have?
- What do I want someone to do after visiting my website?
The clearer you are about the answers, the easier every decision becomes later.
Because a website isn’t just a portfolio.
It’s a tool that helps people understand who you are, what you do, and whether you’re the right fit.
Step 2: Gather Your Content First
It can be tempting to skip this step and jump into making things pretty.
Don’t ☺️.
Before you start customizing pages, gather:
- Your best images — the ones your dream clients will see themselves in
- Your logo files
- Brand colors and fonts
- Testimonials
- Basic page copy
You don’t need everything polished yet.
But having your content ready and organized before you start building will save an enormous amount of time and frustration later.
One of the biggest reasons website projects stall out is because people start designing before they know what they’re putting on the page.
Step 3: Set Your Sitewide Design Settings
Okay, now you can open Showit ☺️.
But before you start replacing images or adjusting layouts, take a few minutes to update your sitewide design settings.
That means things like:
- Your brand fonts
- Your brand colors
- Button styles
- Heading styles
- Paragraph text styles
You’ll be amazed how quickly this one step makes your template start to look like yours.
Instead of customizing each page one by one, you’re creating consistency across the entire website from the start.
And if your template includes tutorial videos, this is a great time to watch them before diving into customization.
I know it’s tempting to dive right in, but spending twenty minutes understanding how your template works can easily save you hours of trial and error later.
Step 4: Map Out Your Core Pages
Now it’s time to think about structure.
Most photographers and creatives don’t need twenty pages.
They need the right pages.
Typically, that includes:
- Home
- About
- Services or Experience
- Portfolio
- Contact
- Blog
- Freebie
If you’re unsure what belongs on each page, start here: What Every Photographer Website Needs To Actually Book Clients (And What Most Templates Miss).
The goal isn’t to create more pages to look more legit.
The goal is to create a logical path for the way your potential clients make decisions.
Step 5: Update Your Copy Before You Obsess Over Design
This is where I see photographers and creatives get stuck.
You might spend an hour deciding whether a heading should be centered.
Or whether a button should be beige or…a slightly different beige.
Meanwhile, the page still doesn’t explain what you do.
Before you start perfecting the design, make sure your copy clearly answers:
- Who you are
- Who you serve
- What makes your experience different
- What the next step is
A beautiful website can draw people in.
Clear messaging is what helps turn that attention into inquiries.
Pro Tip: write your copy in a Google doc first. Do all of your revising and tweaking there, instead of inside of Showit, where you’re more likely to get distracted by other tasks or accidentally move things around in your design.
Step 6: Customize The Design Intentionally
Now comes the fun part.
Start replacing images.
Adjust fonts.
Personalize layouts.
But try not to change everything simply because you can.
One of the biggest mistakes photographers make is using the awesome design flexibility of Showit to play around with everything.
But a well-designed Showit template was built with intention, and making wide-sweeping changes can sometimes undo the thoughtful strategy that made your template a valuable business tool in the first place.
Before deleting entire sections, take a minute to understand why they’re there.
Many of them exist because they help guide visitors through your website in a way that builds trust and encourages inquiry.
If you’re trying to make your website feel more unique without breaking the structure, this post will help: How To Make A Showit Website Template Look Custom (Without Breaking The Design).
A Small Tip That Will Save You Hours
Save the endless image switching for the very end.
Seriously.
Listen…I know that as photographers one of our greatest super powers is expert curation. And you should absolutely use this to your advantage.
BUT, don’t let your debate of whether or not that image of Grandma crying is strong enough for your hero keep you from finishing the page.
Get the structure in place first.
Build the page.
Update the copy.
Make sure everything works. Don’t forget your mobile design.
Then go back and fine-tune the imagery.
The images are crucial.
But they’re often the easiest thing to change later and one of the biggest reasons projects take far longer than they need to.
Step 7: Set Up The SEO Basics
Before you launch, spend a little time setting up the foundational SEO pieces.
Things like:
- Page titles
- Meta descriptions
- Image alt text
- Heading structure — H tags
- Blog setup
You don’t need to become an SEO expert overnight.
You just want to make sure Google understands what your website is about.
These resources will help:
- What “SEO-Friendly” Really Means In A Showit Template
- How To Set Up Your Showit Website So It Actually Shows Up On Google
Step 8: Launch Before It Feels Perfect
For us artists and perfectionists, this might be the most important step of all.
Your website will never feel completely finished.
Mine doesn’t.
There will always be another image you could swap.
Another sentence you could improve.
Another page you could tweak.
But at some point, your goal has to shift from building to launching.
Your website doesn’t have to be perfect to grow your business.
It does, however, have to be live 😉.
Launch it, learn, improve, and keep moving.
When You Start Feeling Overwhelmed
It will happen. It is normal.
Not because you made a bad template purchase or are doing anything wrong.
Just because there are a lot of moving pieces.
So when you get overwhelmed, here’s my advice:
One. Step. At. A. Time. (Cue Jordan Sparks 🎤).
One canvas.
Then one more.
One item on the checklist.
Then the next one.
You do not need to finish your entire website this afternoon.
You only need to decide what’s next and do it.
If you’re feeling stuck, step away for a bit.
Go for a walk.
Work on something else.
Come back later and focus on one section or one task.
Momentum builds surprisingly quickly when you stop trying to finish everything all at once and take it one step at a time.
Key Takeaways
- Most photographers get overwhelmed because they start customizing before they get clear on their content and goals.
- Gathering content first makes customization much easier.
- Setting your sitewide fonts and colors early creates consistency and saves time later.
- The best templates provide solid structure; they don’t require you to reinvent every page.
- SEO setup is easier when you build it into the process from the beginning.
- When overwhelmed, take it one step at a time.
- Launching a good website is far more valuable than endlessly perfecting an unpublished one.
FAQs
How long does it take to customize a Showit template?
It depends on the amount of content you already have prepared, but most photographers can move much faster when they gather images, copy, and brand assets before they start customizing. You could feasibly customize your site in a couple of focused days if you’re well-prepared.
Should I customize every section of a Showit template?
Usually, no. Most strategic templates include sections for a reason. The goal is to make the website feel like your brand, not completely rebuild it from scratch.
What should I do first after buying a Showit template?
Start by getting clear on your goals, audience, and content before opening Showit and making design changes.
When should I update my fonts and brand colors?
Ideally before you start customizing individual pages. Updating your sitewide design settings early creates consistency across your website and prevents you from having to make the same changes repeatedly later.
Can I launch my website before it’s perfect?
Absolutely. In fact, I recommend it. A launched website can grow and improve over time. An unfinished website sitting in draft mode can’t help you book clients.
What if I don’t want to customize the template myself?
That’s exactly where a semi-custom website design experience can help. You get the strategic foundation of a template with expert support bringing it to life.
A Thoughtful Next Step
If you’re still looking for the right template, explore the Pinkerton House Showit Template Shop.
And if you’ve already found a template you love but would like help customizing it, done-for-you Website Design may be the better fit.
Kelsie Pinkerton is a Showit website designer and founder of Pinkerton House, with 20 years of experience in the luxury wedding industry.


")


")

")
")
")

")

")
")


